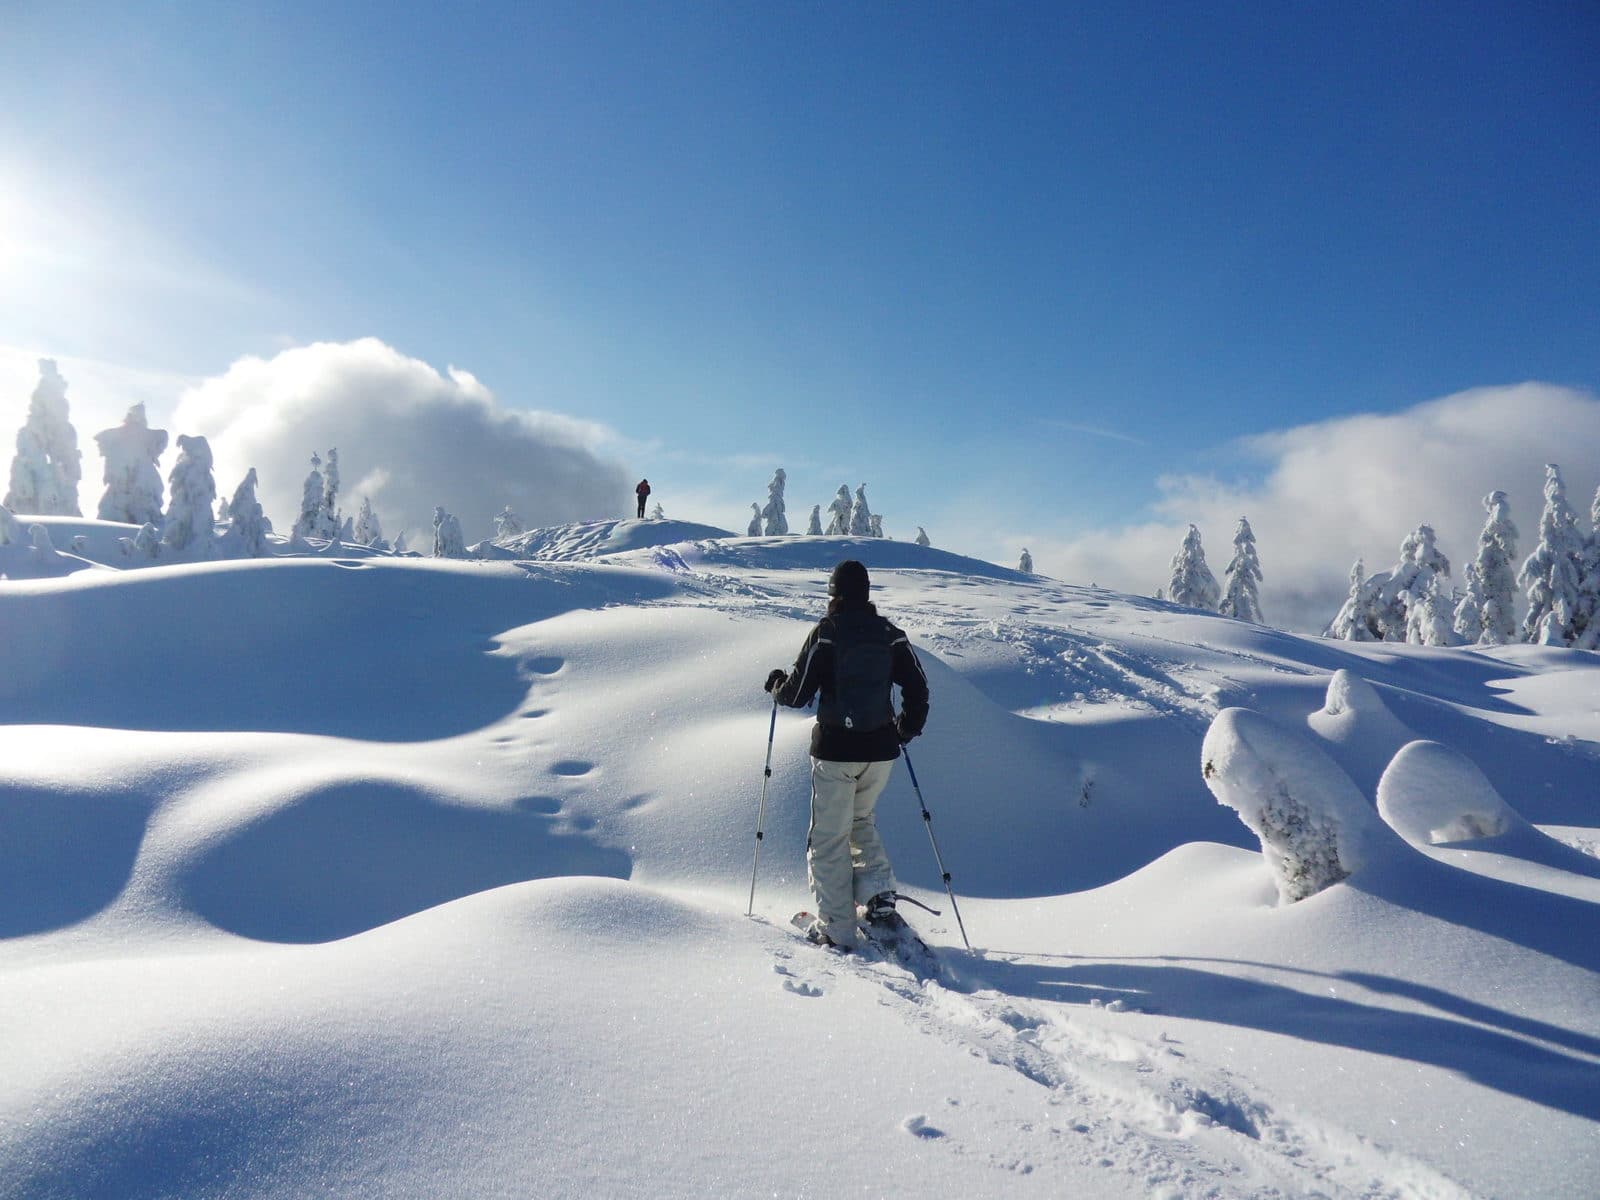
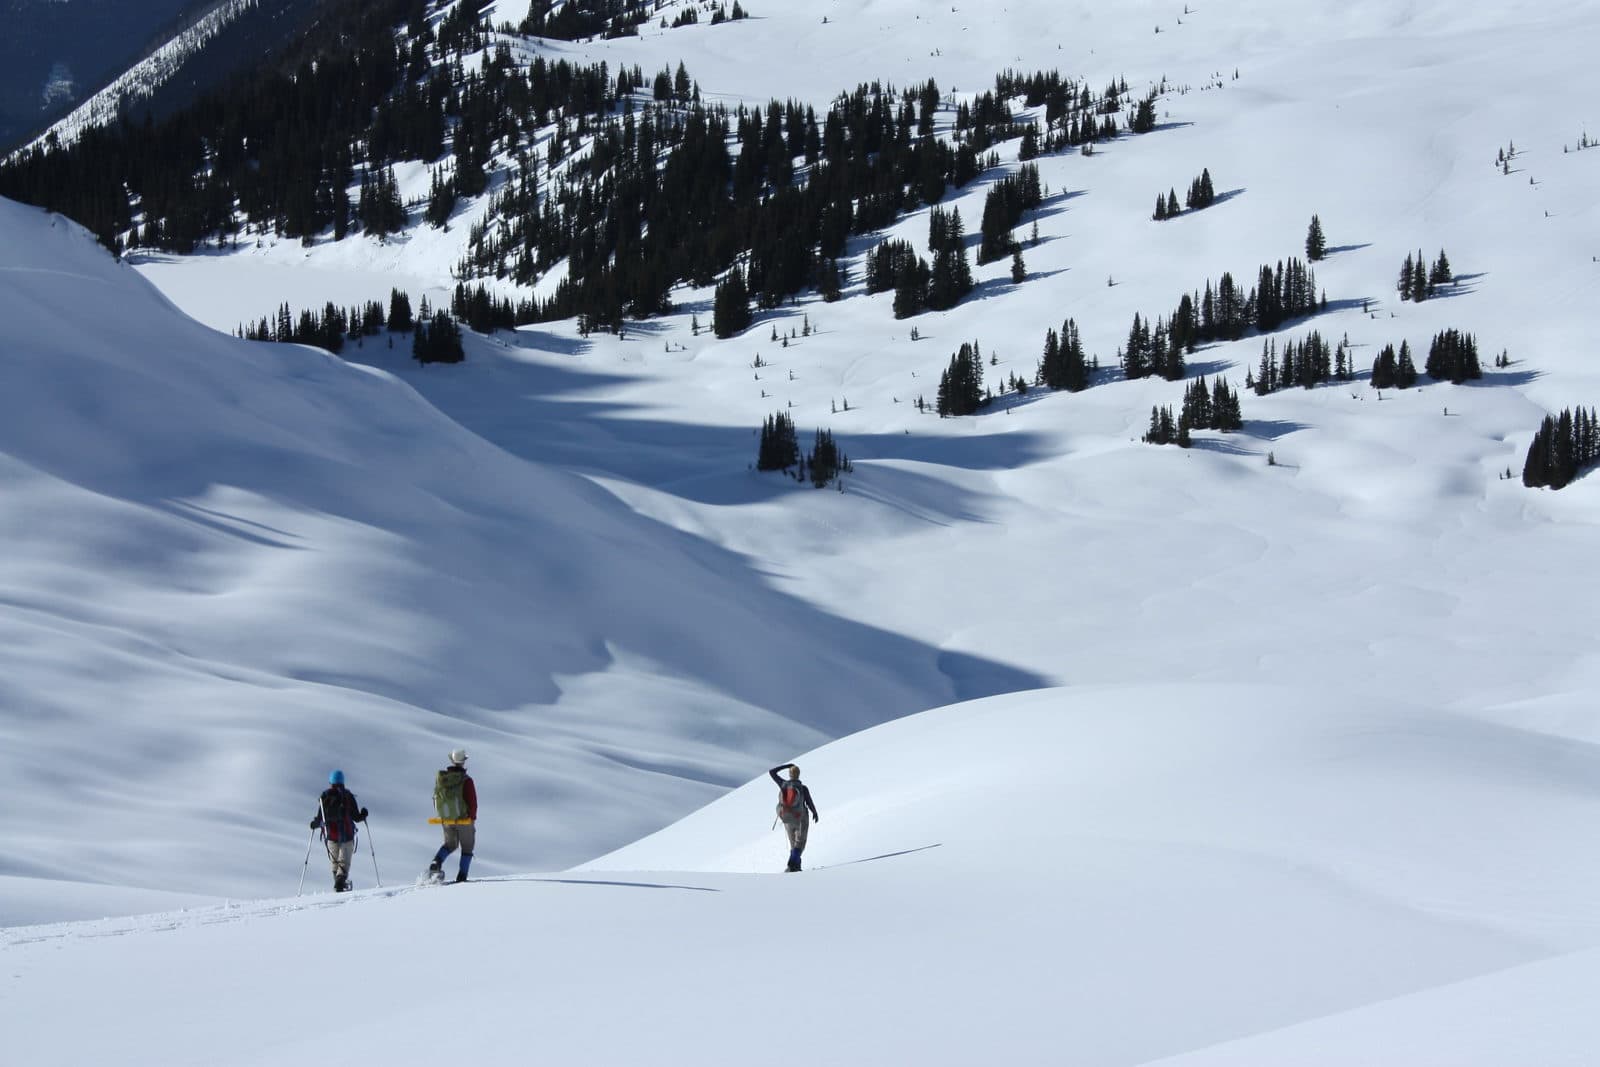
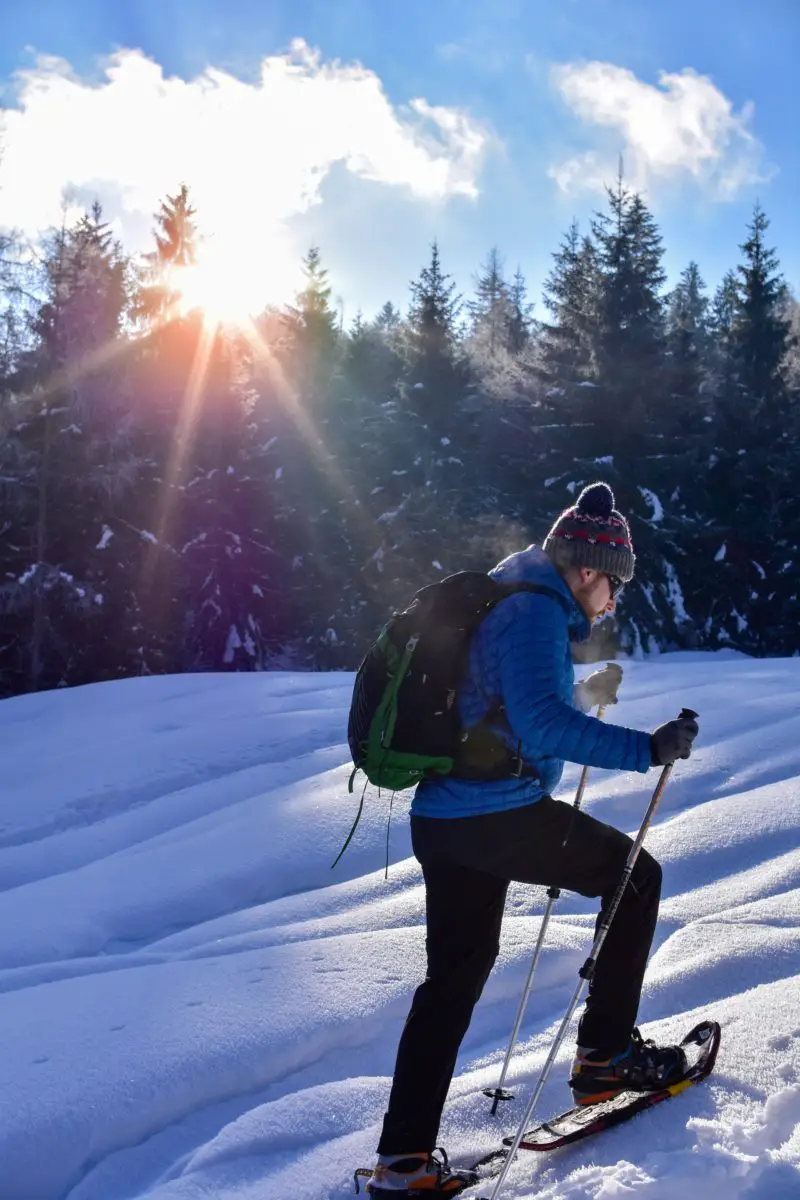
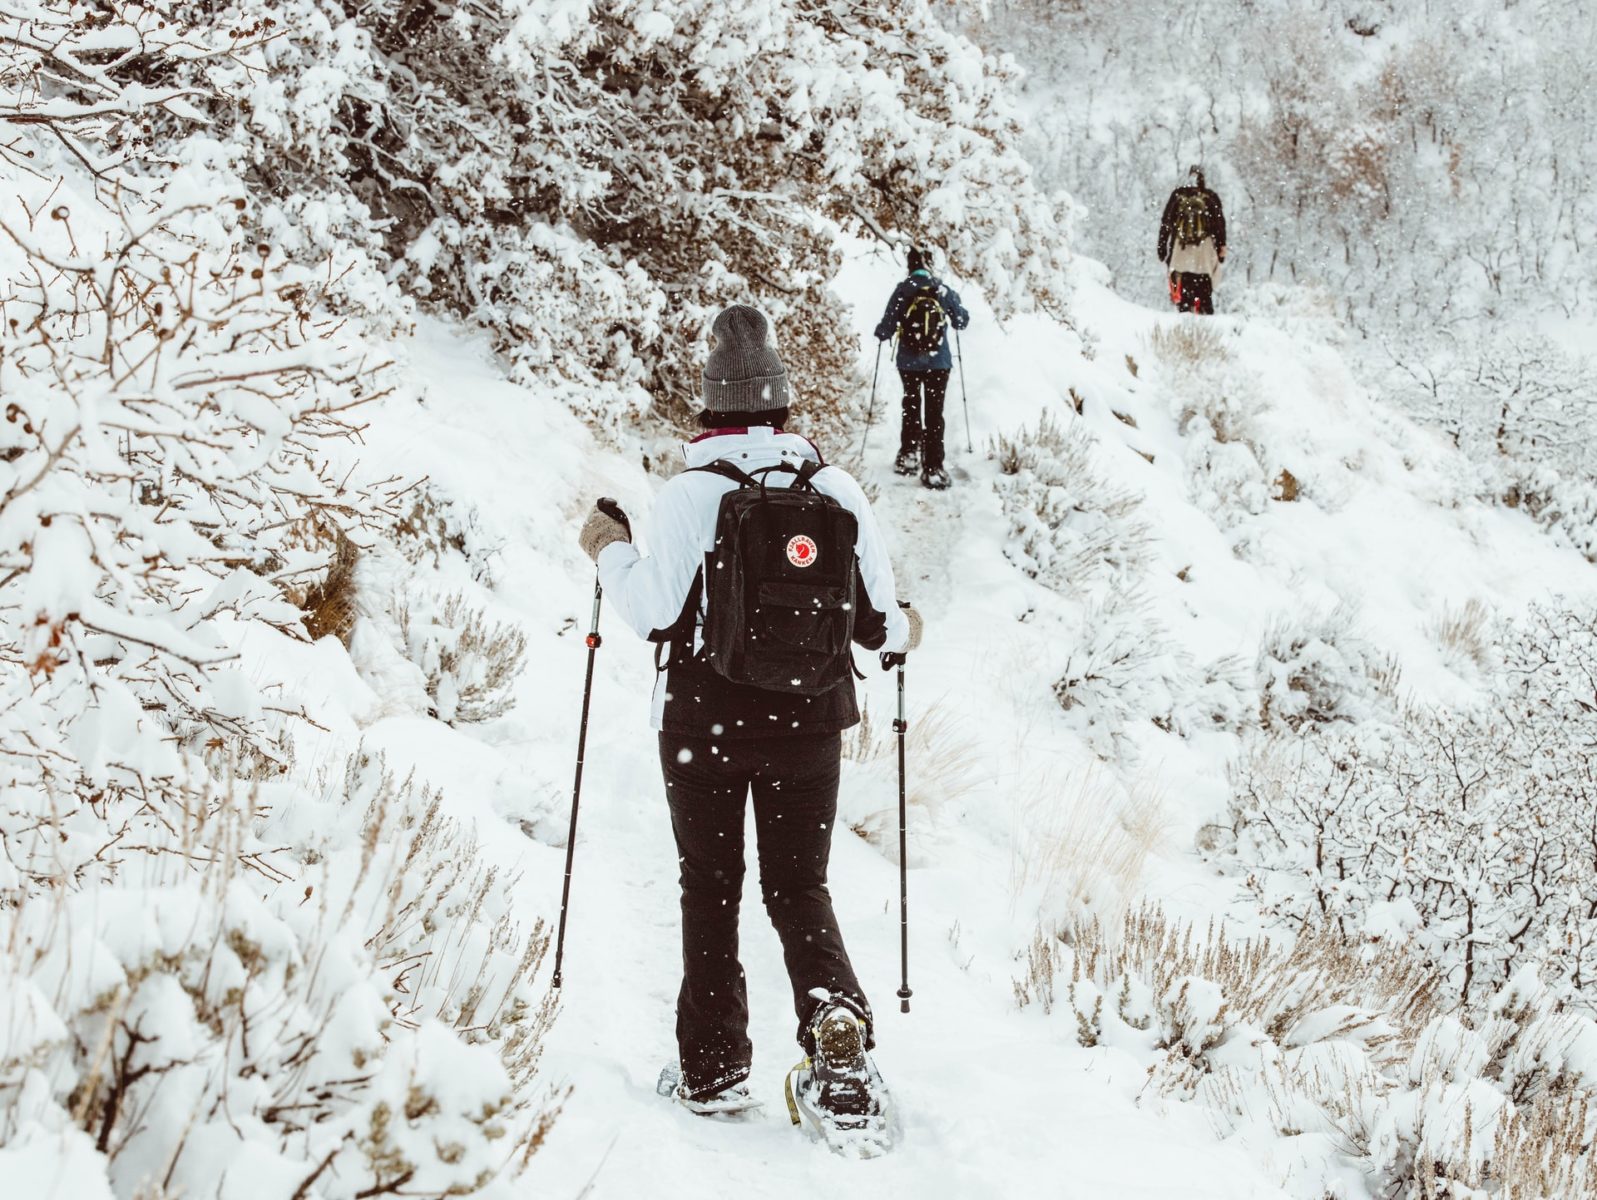
Snowshoeing is a great way to explore nature during the winter. While the main equipment that you need is snowshoes, a good pair of snowshoe trekking poles can make your winter adventure much more enjoyable. Snowshoe poles help you move more efficiently, by providing additional support, power, and balance.
This guide covers everything that you need to know about snowshoe trekking poles. You’ll learn why and when you should use snowshoe poles, as well as the advantages and disadvantages they provide. You’ll learn how to choose a snowshoe trekking pole, and we’ll provide some recommendations to help you find a good pair. Lastly, you’ll learn how to properly adjust your snowshoe poles for all kinds of terrains and surfaces, as well as how to use your poles properly while snowshoeing.
What Are Snowshoe Poles?
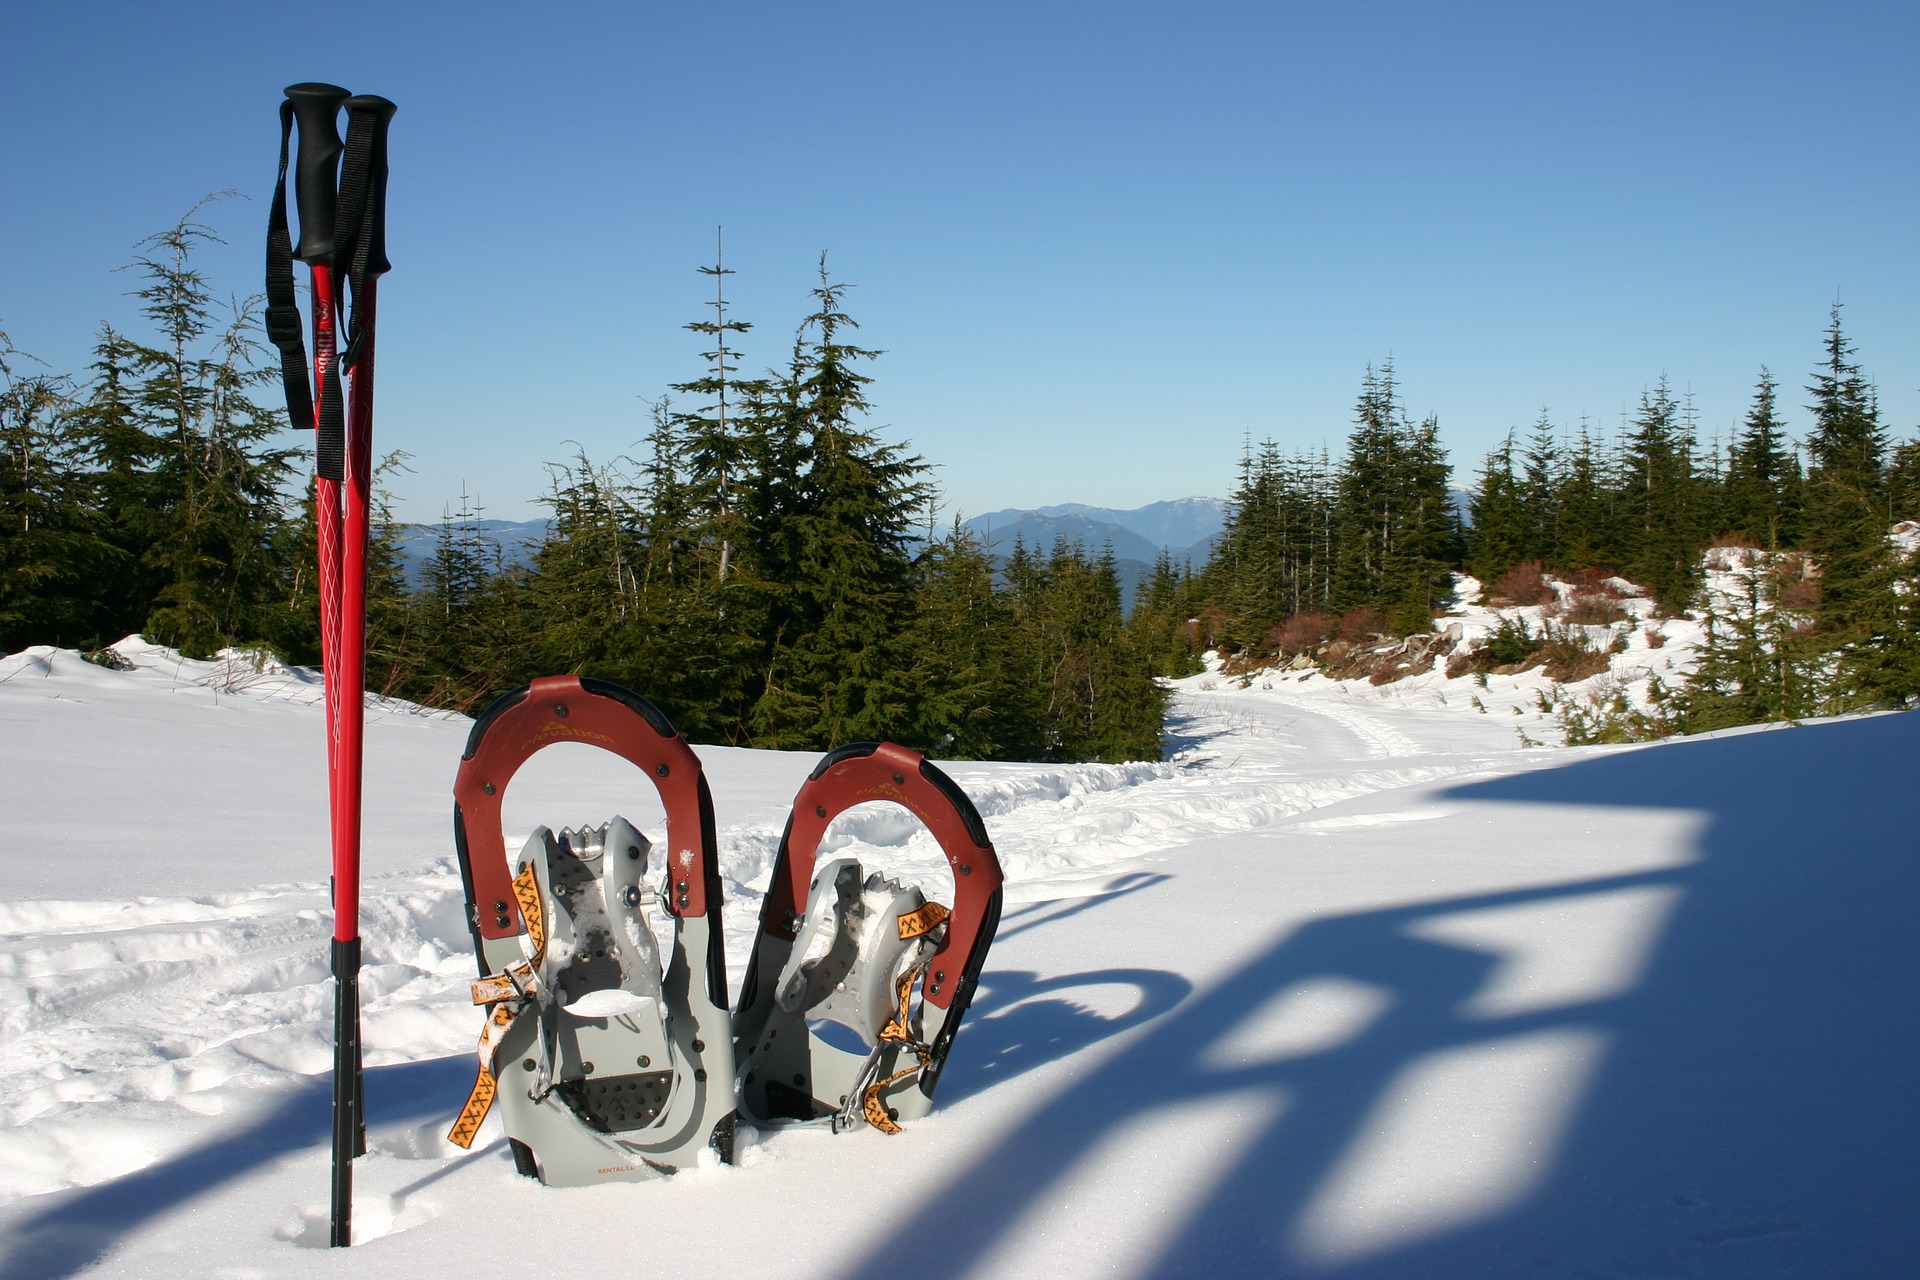
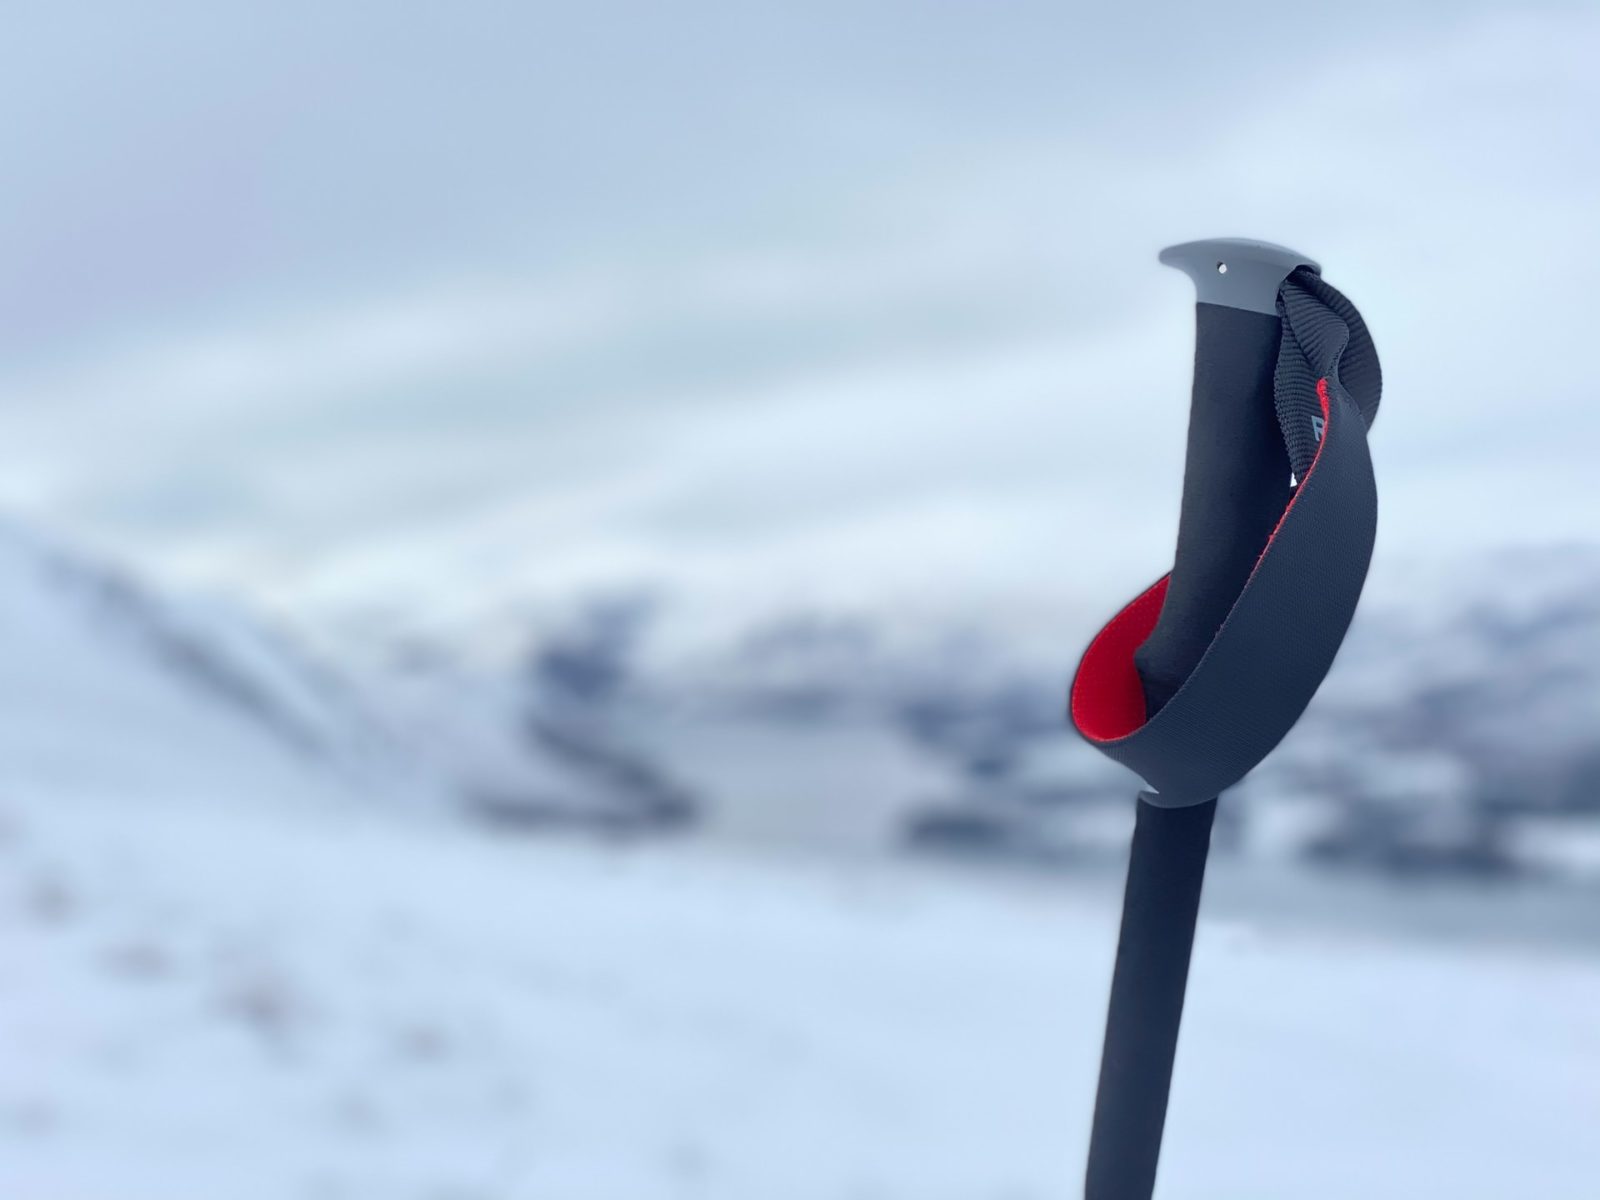
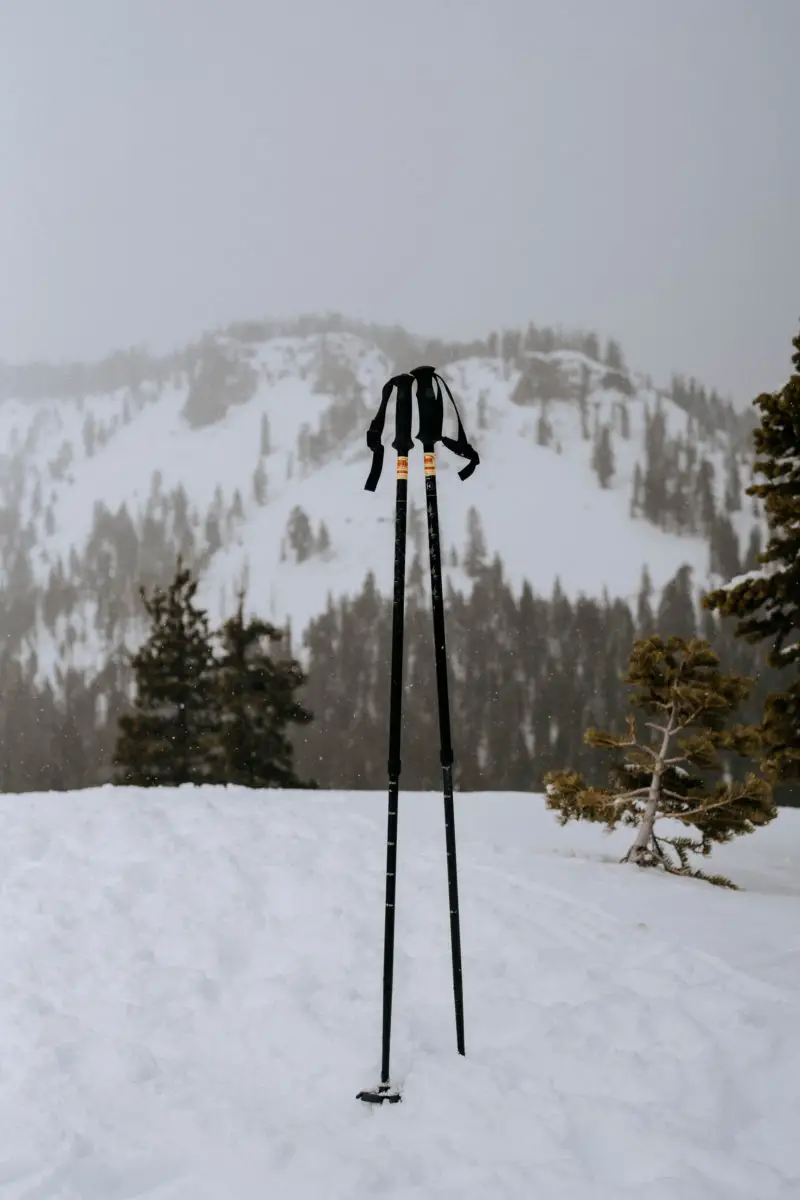
Snowshoe trekking poles are accessory poles used for snowshoeing to help with your balance, support, efficiency, and power. They usually have an adjustable length and are often sold in pairs. Snowshoe poles function similarly to walking sticks but are more lightweight and less cumbersome.
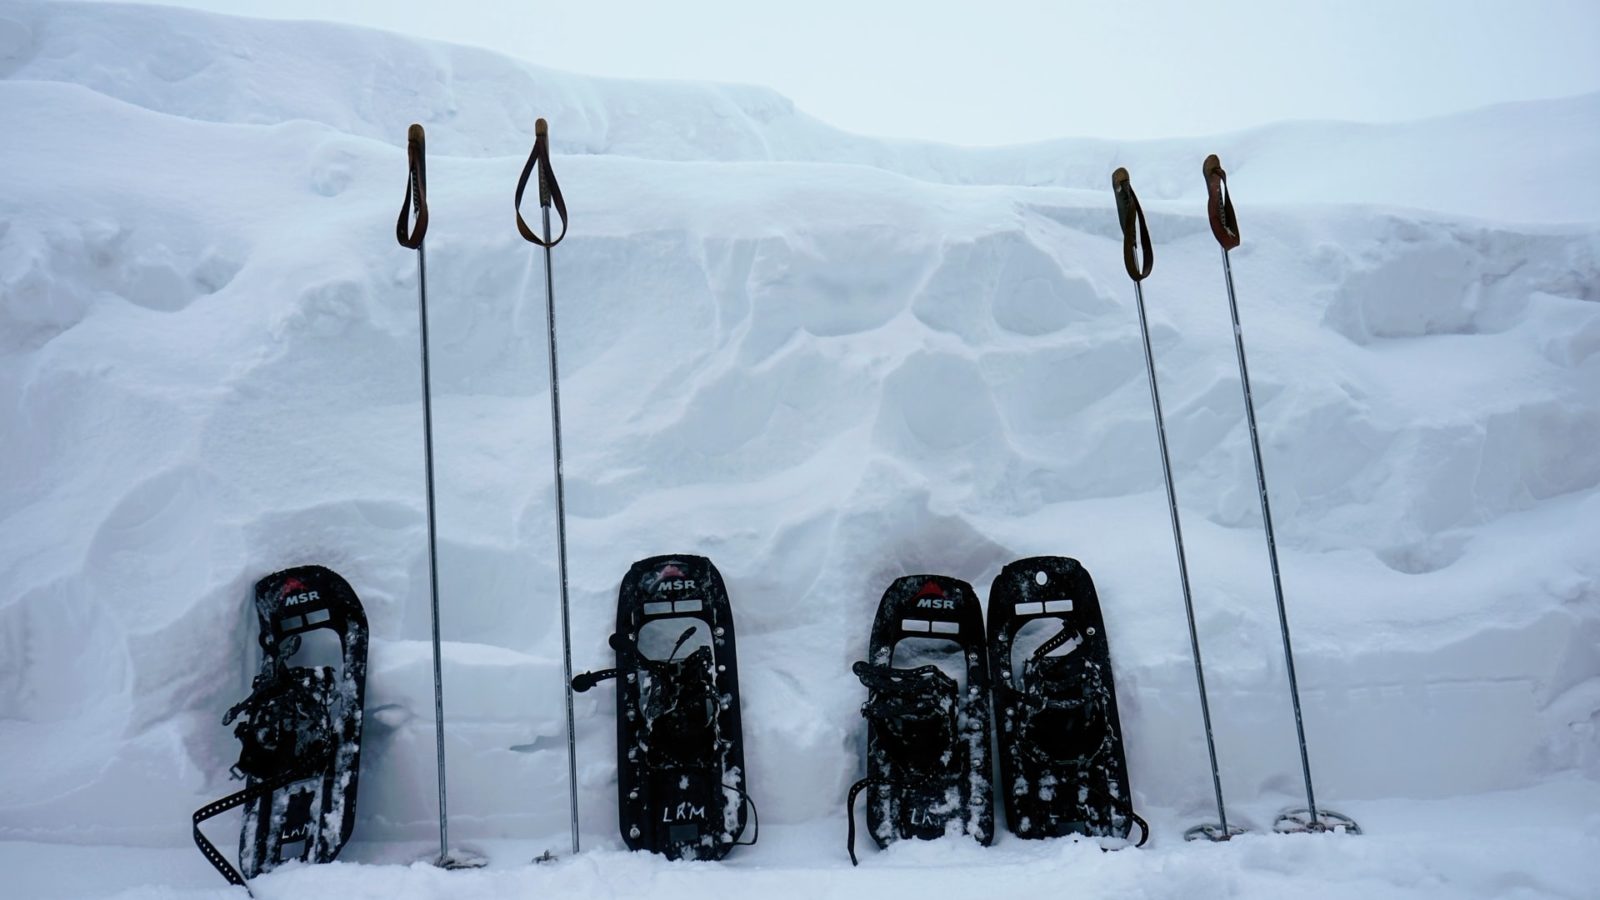
The poles consist of a handle with wrist straps, the pole shaft or body, the tip, and most importantly, the snow baskets. Without snow baskets, your snowshoe poles won’t be useable in the snow!
What Are Snow Baskets and Why Do Snowshoe Poles Need Them?
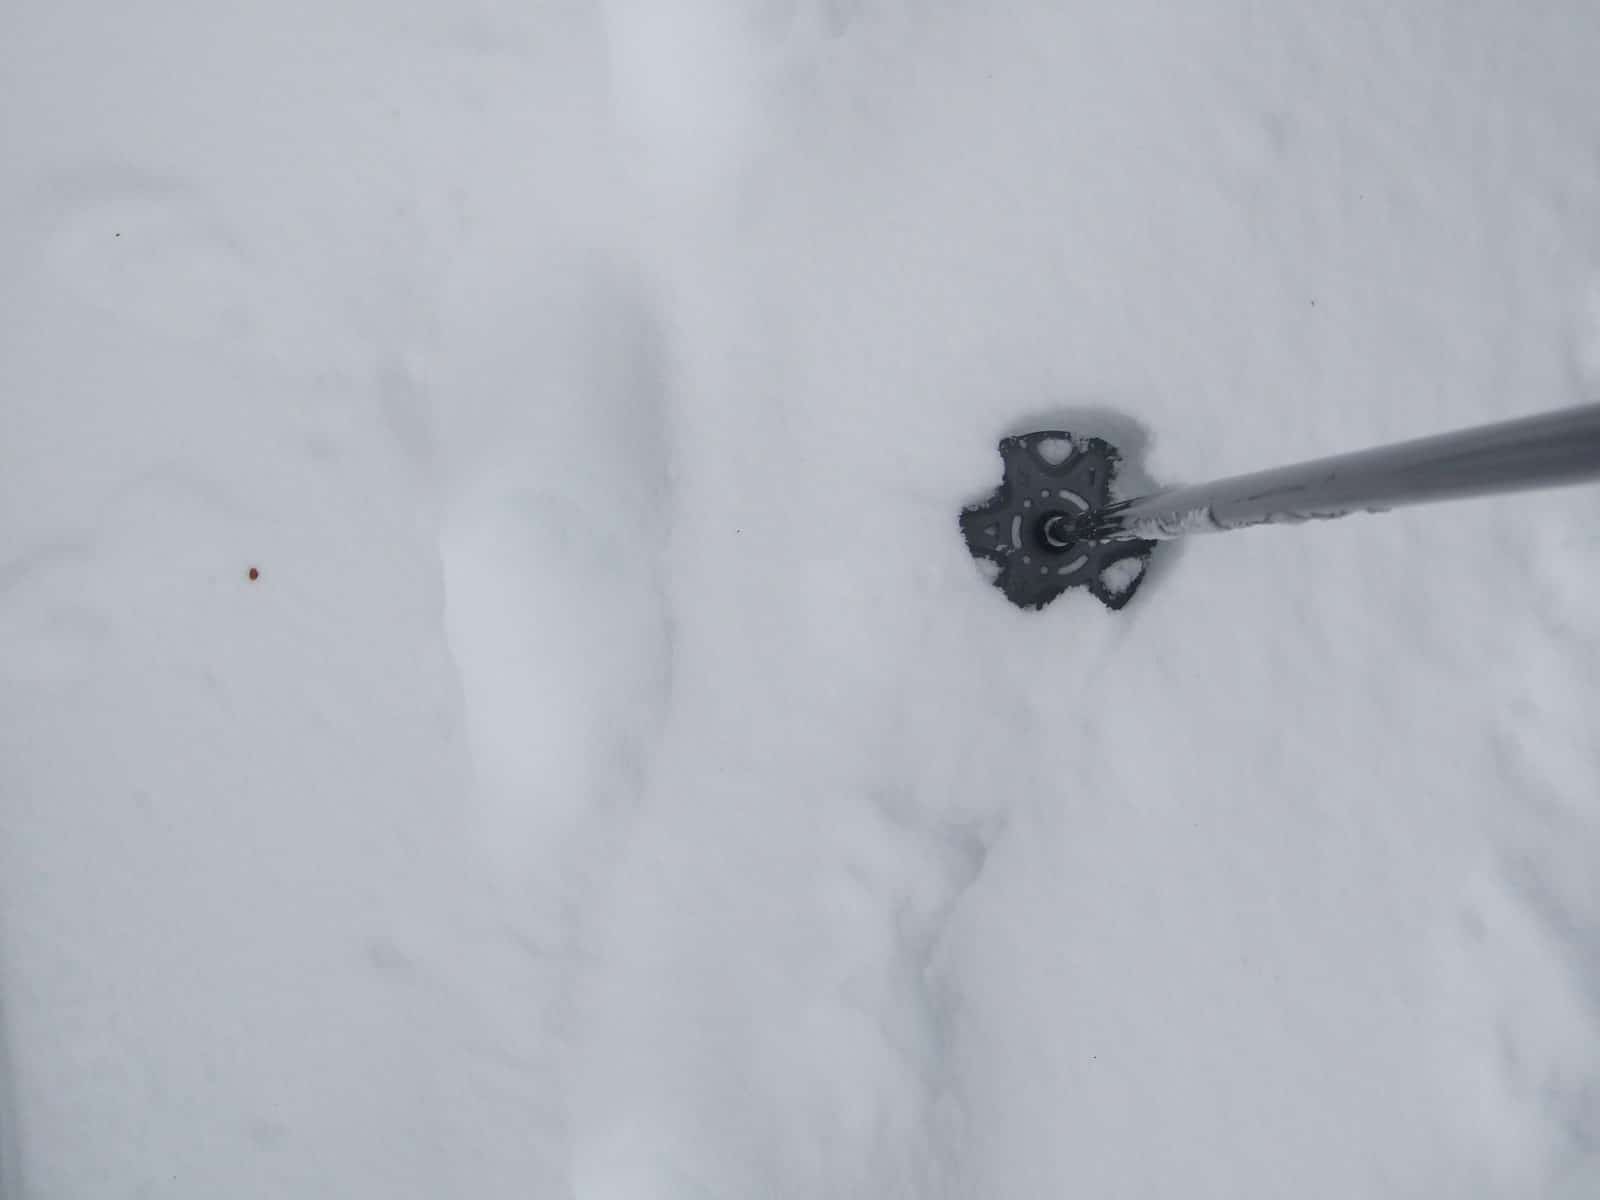
Snow baskets (otherwise known as powder baskets) are the large discs at the bottom of the snowshoe trekking pole that prevent them from sinking deep into the snow. Snow baskets are an extremely important feature and a must-have if you are using poles when snowshoeing.
Similar to how a snowshoe works, the powder basket spreads out the weight of the pole over a larger surface area. This allows your poles to float on the snow’s surface and provide support.
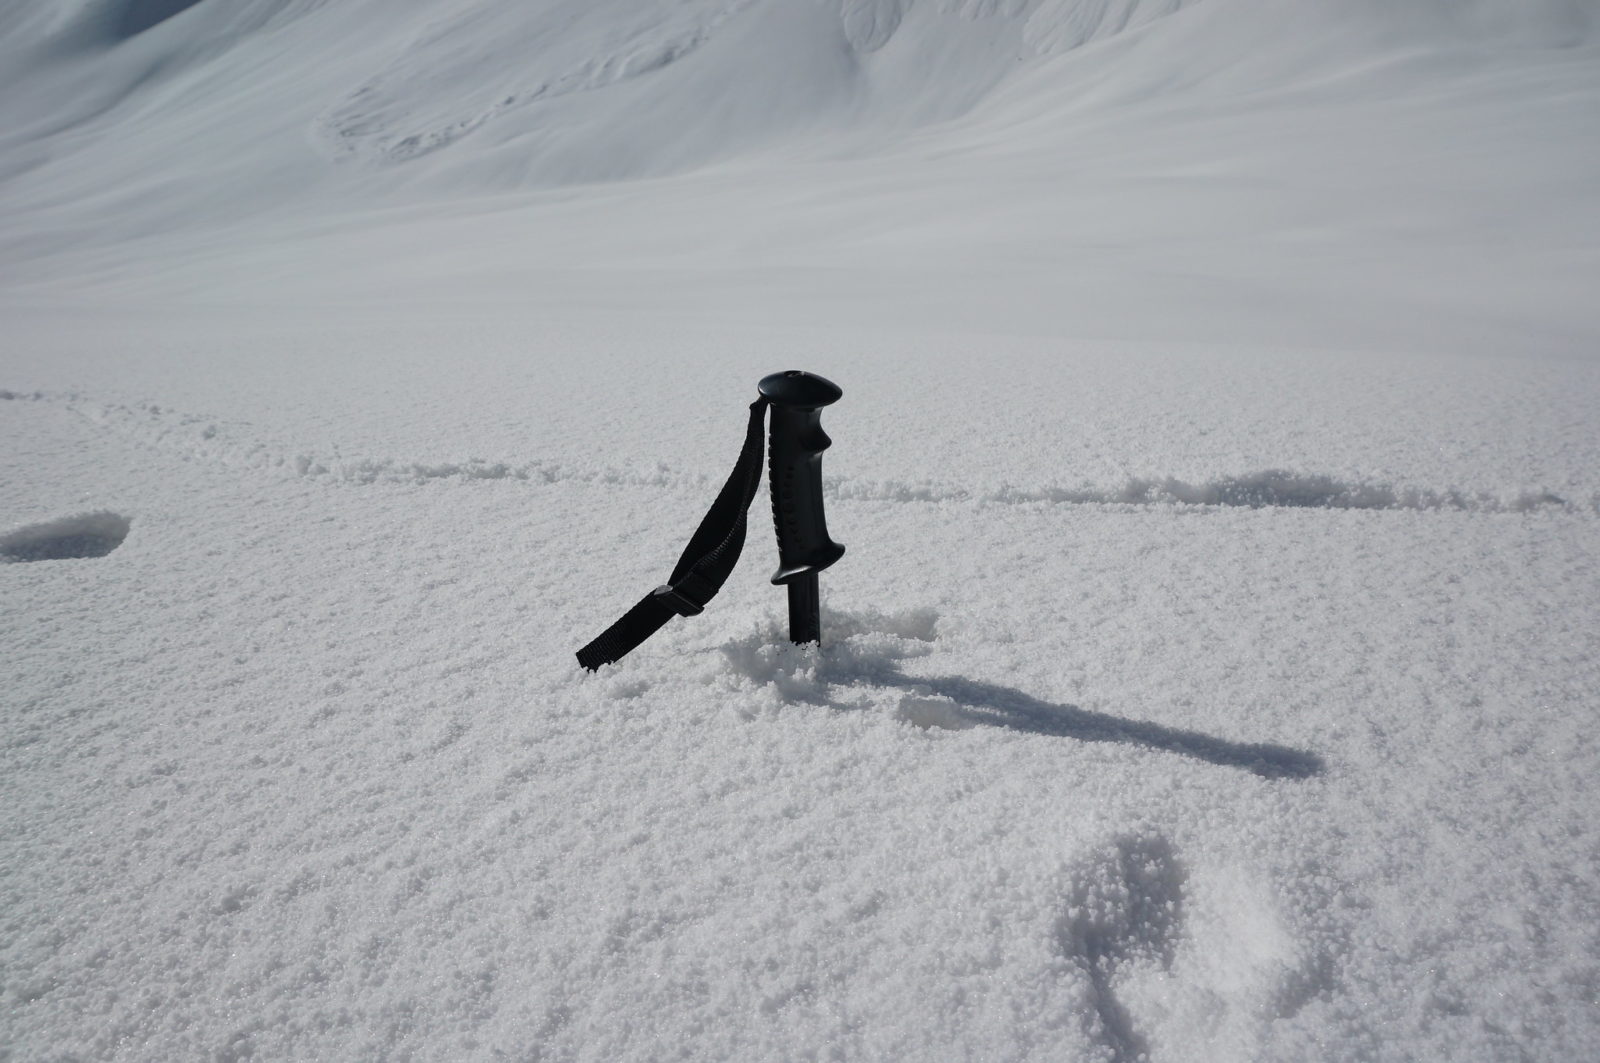
Without a basket, a pole becomes almost unusable in the snow. A basketless pole will pierce straight through soft snow. This is is frustrating, reduces the advantages of using poles, and could even break your pole!
Wider powder baskets work best in the snow. Large baskets have more surface area to catch the snow and keep the pole on the snow’s surface. You might be able to get away with mud baskets on packed snow, but actual snow baskets are required if you plan on snowshoeing through deep, soft snow.
Pros and Cons to Using Snowshoe Poles
There are many advantages to using trekking poles for snowshoeing, especially on longer hikes. They:
- Reduce the stress and weight load on your lower body
- Help avoid injuries, joint pain, and muscle soreness
- Improve balance and reduce falls
- Provide support on uneven or hilly terrain
- Add traction
- Strengthen muscles in upper body
- Give your upper body more of a workout
- Reduce fatigue and improve movement efficiency
- Help you pace yourself better
- Deter wild animals
- Can be used for other activities (e.g. hiking) or as tent poles for lightweight tents

There are some disadvantages to using snowshoe trekking poles. They:
- Limit your use of your hands while snowshoeing
- Add extra weight and must be carried when not being used
- Use extra calories because your upper body is being involved in the workout
- Add an extra cost to snowshoeing
- Can be awkard to learn how to use (you’ll catch on quick though)
- May catch on tree branches or other obstacles
Do You Need Poles to Snowshoe?
Snowshoe poles are highly recommended for snowshoeing, but you don’t have to use them if you don’t want to. It’s really up to your personal preference.
Using poles will make your snowshoeing experience much more enjoyable. Snowshoeing without poles can be hard on your body and balancing may be difficult on uneven or hilly terrain. Snowshoe poles provide support and improve your power and balance throughout the hike. This allows you to snowshoe efficiently, faster, and for longer durations, with less chance of injuries or soreness.
On longer, more difficult, or technical hikes, snowshoe poles will make a huge difference. Also, if you’re clumsy and trip over your own feet, you’ll really benefit from the added balance that snowshoe poles provide!
You can make your decision based on the advantages and disadvantages listed above for using snowshoe poles. If you can’t decide, you can always rent a pair of poles from a local outdoor store or borrow a pair from a friend. This will give you an idea of whether you want to invest in a pair or not.
Also, you don’t have to use your poles all of the time. You can store them in your backpack and take them out when you feel like you need them again.
When to Use Snowshoe Poles?
You don’t always have to use your snowshoe poles if you have them. In some situations, it’s better to be using poles, while in others, you may prefer having your poles stored on your back.
We highly recommend using snowshoe poles when:
- Snowshoeing through deep snow
- Carrying a heavy backpack
- Going for a long hike
- Walking on icy or slippery terrain
- Hiking on a technical or difficult trail
- Heading up and down hills or a mountain
- Preventing joint or muscle pain (especially if you have a recurring injury)
You might not need snowshoe poles when:
- You need to carry something
- You need your hands free
- You are snowshoeing on a short, easy trail with non-technical terrain
Best Snowshoe Poles in 2022
Best Overall Snowshoe Poles: Black Diamond Trail Ergo Cork
Best Lightweight Snowshoe Poles: Leki Micro Vario Carbon
Best Bang for your Buck Snowshoe Poles: Black Diamond Distance Z
Best Budget Snowshoe Poles: Cascade Mountain Tech Aluminum Trekking Poles
Considerations When Buying Snowshoe Trekking Poles
There are a few features to think about when you’re shopping for snowshoe trekking poles. Below, we’ve listed some things that you should consider before purchasing a set of poles.
Grip Material: Foam vs Cork vs Rubber
Foam is a soft and affordable material but it absorbs and retains sweat. It is durable but it does break down a bit faster than the other materials.
Cork is comfortable and durable. It is also porous, so it wicks away sweat well. As a result, cork handles are great for preventing blisters! Cork also helps with shock absorption and forms to your grip over time. However, cork handles are often more expensive. Also, the sweat-wicking property of cork is less useful when wearing gloves.
Rubber grips are affordable and durable. However, they aren’t as comfortable as the other two materials. Rubber can cause chafing when your hands are sweaty, leading to blisters. This may be less problematic when wearing gloves.
Which grip material you choose is up to your personal preference. We recommend buying snowshoe trekking poles with cork grips, which maximizes comfort and durability. The grip material will make less of a difference if you’re wearing gloves while snowshoeing. However, it’s nice to choose a comfortable grip in case you snowshoe without gloves.
Pole Material: Aluminum vs Carbon Fiber
Aluminum poles are heavier but more durable. They are less likely to bend and if they do, you can often bend the pole back without it breaking. Additionally, aluminum poles are cheaper and less sensitive to cold temperatures.
Carbon fiber poles weigh much less than aluminum poles. However, as a result, they are less durable and will break if bent too far. This can be an issue if your pole gets damaged when you’re far into the backcountry. Also, carbon fiber poles are more expensive than aluminum.
For snowshoeing, we recommend aluminum poles because they will do better in cold conditions. You probably won’t notice the extra weight of the aluminum, unless you’re traveling long distances. Aluminum is also better if you’re rough with your poles or you need something more affordable.
Carbon fiber poles are best if you’re trying to hike long distances or go at a fast pace. You should choose them if you want the lightest and most energy-efficient pole possible. However, for most people, aluminum poles should work well.
Pole Type: Telescoping vs Folding Poles
Fixed-length poles are a single, unadjustable length, similar to a ski pole. Because their length can’t change, you must pick a pole size that’s appropriate to your height. Usually, fixed poles come in increments of 10 cm, from 100 cm to 130 cm. They have fewer pieces so they usually weigh and cost less.
Telescoping/Adjustable poles are collapsible (like a telescope), so their length is adjustable. However, they don’t collapse down as small as folding poles and take longer to extend. They are usually more durable but heavier than folding poles. Also, if the pole breaks, you can replace single sections instead of the entire pole.
Folding poles (or Z-style poles) consist of two to three sections that you can fold, like a tent pole. They are lightweight, very packable, and easy to use. However, Z poles are either fixed in length or can only be adjusted about 20-cm. You have to choose an appropriate length for your height. Also, folding poles sometimes feel less secure than telescoping poles; however, the tension that holds them together can usually be adjusted.
The choice between pole types is up to personal preference. Some people prefer telescoping poles because you can change the pole length as much as you want. This is useful if you’re hiking through hilly terrain, or want to lend your poles to a friend. However, many people prefer folding poles for their packability and weight. You should avoid using fixed-length poles for snowshoeing because they can’t be adjusted and it’s difficult to stow them on your back.
Locking Mechanism
If you buy telescoping poles, you also have a choice of the locking mechanism.
External lever or flick locks have a clamping mechanism that is locked with a lever. They are easy to use and reliable. Also, they are easier to fix if the mechanism needs tightening.
Push-button locks use a metal button that you push down to unlock and collapse the poles. Poles with push buttons may not have an adjustable length. Sometimes, the push button gets jammed with snow or ice.
Twist locks use a twisting mechanism to secure the pole sections. The twist locking mechanism is more likely to fail than lever locks. If the mechanism fails, it will be difficult to unlock or tighten your poles.
We prefer a lever/flick locking mechanism. This pole lock mechanism works well, even when you have your gloves on.
The locking mechanism is often the part of the snowshoe pole that will fail. All locking mechanisms need to be checked and tightened regularly. You can often repair loose locks, and your poles likely come with a tool to help you tighten the locking mechanism. Anecdotally, twist locks seem to fail more often than lever locks.
Pole Length: Sizing Your Snowshoe Trekking Poles

When you buy a snowshoe trekking pole, you will need a pole length that is appropriate for your height. Poles that are incorrectly sized will be uncomfortable to use and ineffective.
Luckily, telescoping poles are adjustable, so you don’t need a specific length. Folding poles are less adjustable and sometimes have a fixed length, so you need to pick a pole that’s appropriate for your height.
If you’re buying a fixed-length or folding pole, here are the proper snowshoe pole lengths you should buy based on your height (based on REI recommendations):
| Your Height | Recommended Pole Length |
| 5 ft. or shorter | 100 cm (39 in.) |
| 5 ft. 1 in. to 5 ft. 7 in. | 110cm (43 in.) |
| 5 ft. 8 in. to 5 ft. 11 in. | 120cm (47 in.) |
| 6 ft. or taller | 130cm (51 in.) |
Pole Weight
The weight of your poles is an important consideration. Using heavier poles can get exhausting by the end of a long winter trek.
The weight of a pole is mostly determined by whether it is made out of carbon or aluminum. Aluminum poles usually weigh 18-22 ounces per pair, while carbon poles tend to be 12-18 ounces per pair.
Other features can also affect the weight of your pole (e.g. folding poles are often lighter). Also, heavier poles tend to be more durable, but this is not always the case.
For shorter snowshoeing adventures, you’ll be fine with heavier snowshoe poles. The weight of your trekking poles will make a bigger difference on longer snowshoeing sessions when you’re more prone to fatigue and need to conserve as much energy as possible.
Shock-Absorbing vs Rigid Poles
Shock-absorbing poles have internal springs that absorb and reduce shock, which will keep your joints from hurting. This feature is most useful for when you’re going downhill. It can be turned off when you don’t need it.
Rigid poles don’t have shock absorption features. As a result, these poles are usually cheaper and lighter weight.
For snowshoeing, we recommend buying standard, rigid poles without shock absorption. The snow will act as a natural shock absorber. Also, the springs on shock-absorbing poles are another mechanism that can fail and can lock up in colder conditions. If you plan on using your poles on non-snowy, harder surfaces, the anti-shock feature is nice to have but not necessary.
Snowshoe Pole Brand
The brand of the snowshoe pole can play a big role in your choice. Good brands make consistently high-quality poles with good warranties and excellent customer service. For these brands, you will usually pay a higher price to buy your poles, but you’ll know they’re reliable and backed by a brand with a good reputation.
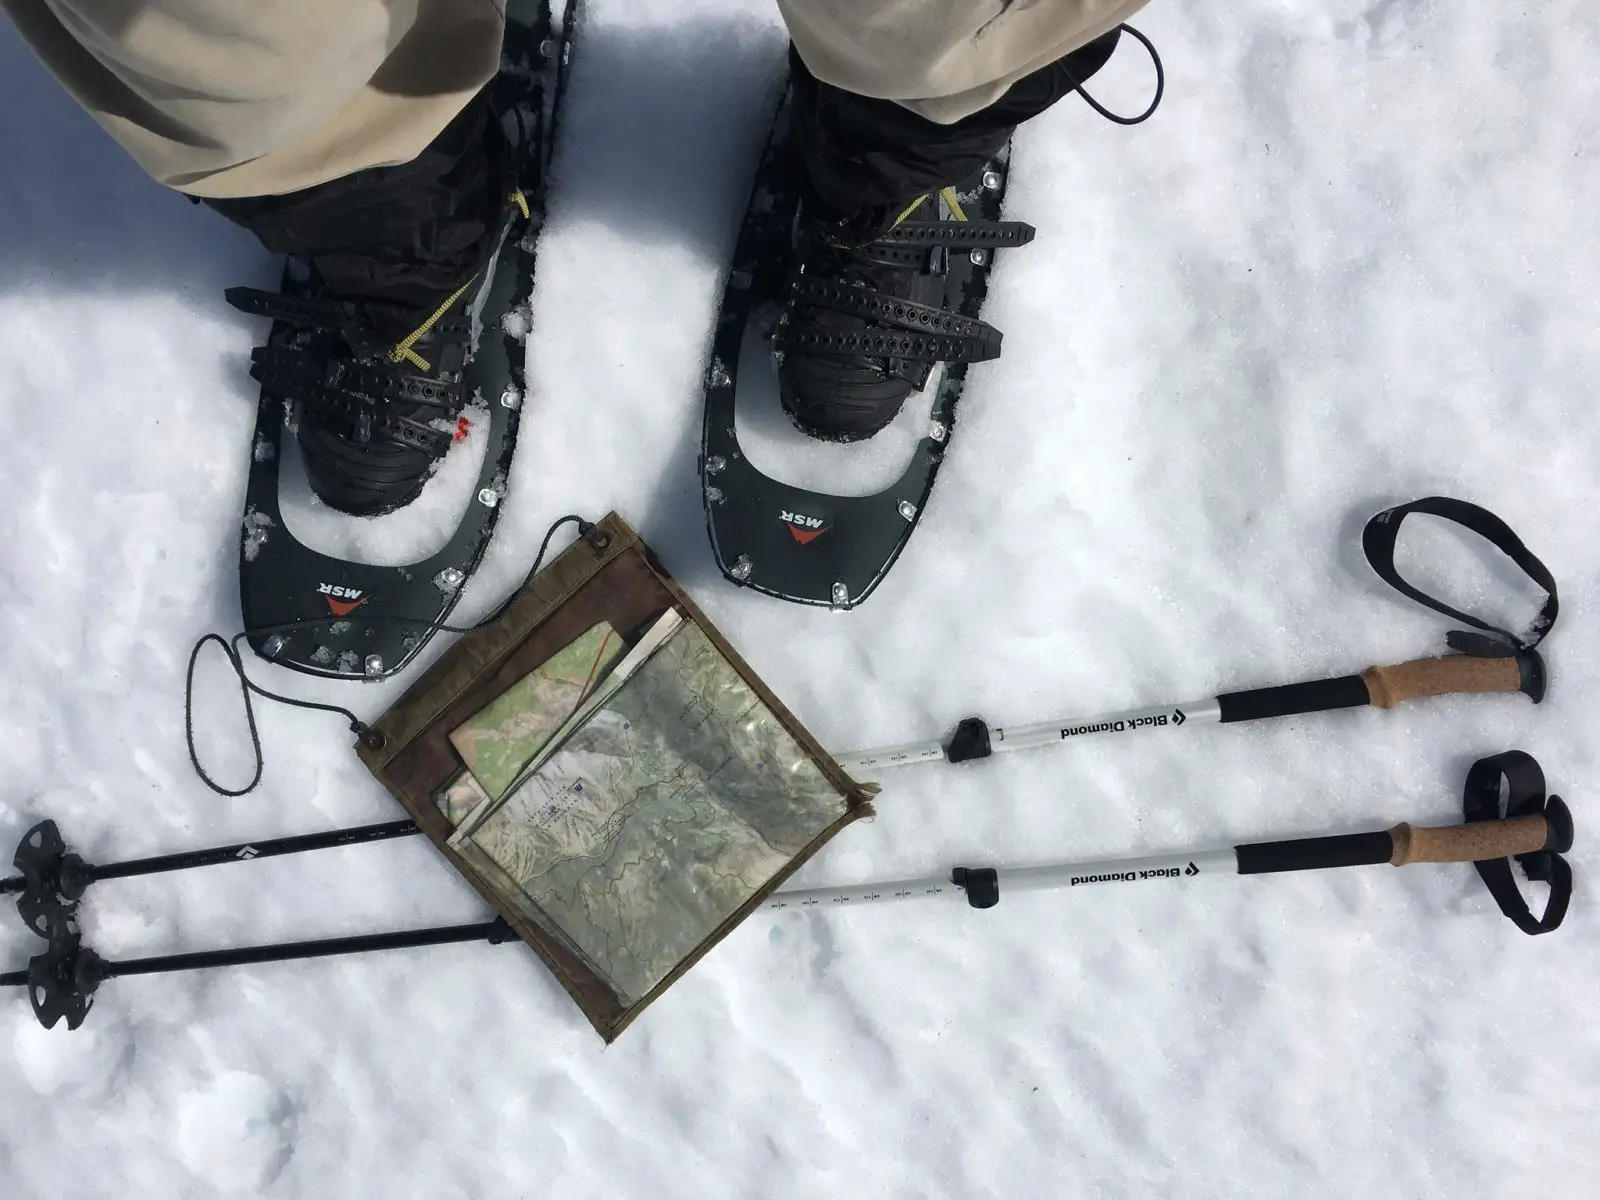
Our favorite trekking pole brand is Black Diamond. Their snowshoe trekking poles are reliable and work great. Based on our experience, they have awesome customer service and will replace parts of your poles that fail. We personally use the Black Diamond Trail Cork Ergo poles.
Another great, popular snowshoe trekking pole brand is Leki. They make poles that are just as good as the ones from Black Diamond. Leki also has great customer service and reliable lightweight poles that are quite sturdy and durable.
If you’re looking for good budget poles, some brands that you can try are Cascade Mountain Tech, Kelty, and Montem.
Cost
One of the main considerations for many people is the cost of the snowshoe poles. Cost is affected by all of the factors discussed above, including durability, pole materials, additional features, and brand.
The casual snowshoer probably doesn’t need a high-end, pricey pair of poles. However, cheap poles will need to be replaced more often because they are often more flimsy and less durable. As a result, you might end up spending more on cheap poles that are replaced regularly, compared to a good quality pair that lasts for a long time.
We recommend buying a mid-range priced aluminum set of snowshoe poles. This will be a good compromise between cost and quality. They should last for a long time and work reliably without bending or breaking.
How to Adjust the Length of Snowshoe Poles
Properly adjusting your snowshoe trekking poles is important before you head out for your snowy adventure. If your poles are an improper length, they won’t work as well and will be more difficult to use.
The trick to setting your snowshoe pole’s height is to turn it upside down. Then, you’ll adjust the pole’s length so that your elbow forms a right angle when your hand grips the pole just beneath the basket. This sets the pole to the appropriate length for that level of terrain.
If you’re hiking through hilly terrain, you might need to adjust the pole length as you go. For downhill snowshoeing, you’ll need to lengthen your poles. For uphill, you should shorten the poles. If you’re snowshoeing along a hill, you can shorten the pole on the uphill side and lengthen the other on the downhill side. The amount that you’ll need to adjust your poles depends on the slope.
How to Use Snowshoe Poles: Technique and Tips
You can use your poles in whatever way works best for you. However, there are some proper techniques and tips that can help you use your poles more effectively while snowshoeing.
How to Use the Wrist Straps Properly on Snowshoe Poles
Many snowshoers don’t use their pole’s wrist straps effectively. To use the straps properly, you’ll want to slip your hand through the bottom of the strap. Then, grip the pole while resting your wrist on the strap.
The straps aren’t just there to keep you from dropping the pole! This position will allow you to push more power through your wrists. You won’t have to squeeze the handle of the pole as hard, reducing the amount of energy needed to use the poles. Straps make a huge difference in your comfort and power through the walk.
The length of the wrist strap is adjustable. First, you need to unlock the strap so it can be moved. The strap mechanism depends on your pole’s brand and model. Some poles require you to pull the strap up vertically to unlock the strap. Others require you to push or pull the tension block to release the strap. Some poles just use velcro, instead.
Once you can adjust the straps, you can either increase or decrease the loop size. If the strap is too large, pull on the loose end of the strap until the strap is at the appropriate length. Or, if the strap is too tight, pull on one side of the loop.
Improperly adjusted wrist straps reduce the pole’s efficiency and can cut off circulation or cause blisters. With proper snowshoe pole strap adjustment, your grip should stay in a comfortable spot on the handle, with the strap supporting your wrist.
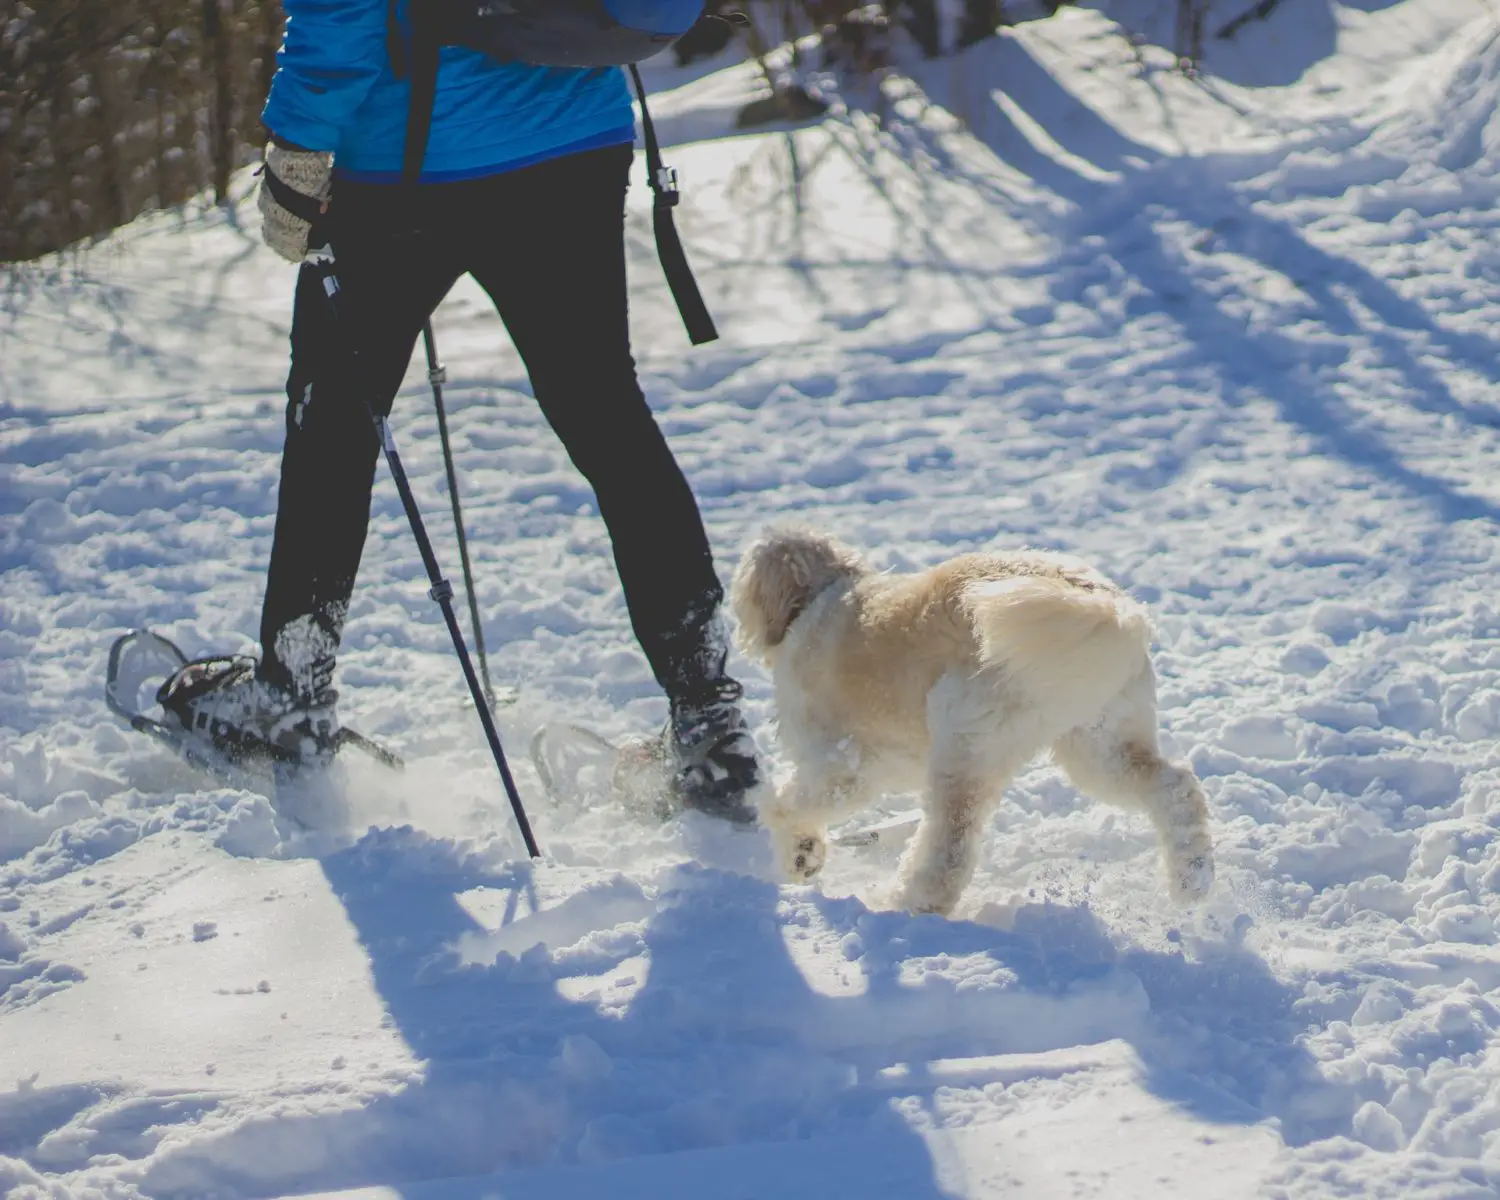
Alternating Your Snowshoe Poles and Legs
When walking with snowshoe poles, you want your legs and poles to alternate (left foot/right pole, right foot/left pole, etc.). This positioning will give you the most stability and power.
Likely, your body will naturally fall into this rhythm. However, if it doesn’t, you can practice a bit before heading out for the day. Don’t worry, it’s not a steep learning curve!
Sometimes, you will fall out of rhythm as you snowshoe. If you do, keep walking and keep your poles off the ground for a few steps. When you feel like you’re ready to reset, place your poles down in the proper rhythm and keep going!
Walk Naturally with a Neutral Arm Position
When you’re using snowshoe poles, try to walk naturally, keeping a neutral arm position. Allow your arms to swing with a natural rhythm as you plant the poles.
Keep your arms angled to allow your shoulders to push you forward. You can keep your poles pointed slightly backward as you move. This will allow you to push yourself forward most effectively.
Double Planting Your Poles for Extra Power and Stability
In some cases, you might want to push both of your snowshoe poles into the ground (double planting) at the same time to give yourself extra stability and/or power.
You might do this on steep uphill or downhill sections. It’s also a great maneuver to help you navigate obstacles like logs.
Double planting your poles allows you to put a lot more weight and pressure onto your poles. To do this, place both poles on the ground, transfer your weight through your shoulders into the poles, and then take one or two steps. You can continue double planting until you don’t need to anymore.
Using Your Snowshoe Poles on Different Surfaces
Your poles can help with all types of terrains and different kinds of surfaces. Here are some ways that you can use your poles for different situations.
Snow
Snowshoe poles work great on snow, so long as you have snow/powder baskets attached. If not, your pole will sink deep into the snow, and be almost useless. On very compact snow, you might not need snow baskets (mud baskets might be enough) but you probably won’t need snowshoes either!
Ice, Rock and Gravel
Snowshoe poles typically have tungsten carbide or metal tips on the end, which don’t do well on hard surfaces. If you’re walking on ice, rock, or gravel, you should use a rubber tip or boot on the end of the poles.
The rubber pole tips will allow your poles to grip hard or slippery surfaces better. They will prevent your poles from slipping. Also, the tungsten carbide or steel tips won’t scratch up the rocks as much.
Snowshoe poles will provide extra stability while walking across slippery surfaces like ice. Also, they are useful for testing ice thickness and helping you cross partially frozen streams.
Mud, Slush, Sand and Other Soft Surfaces
For soft surfaces, you can use your snow baskets if you don’t want to switch them out. However, mud baskets will work much better on surfaces like mud, slush, or sand.
Mud baskets are smaller and conical than snow baskets. Also, unlike powder baskets, they are usually completely round with no holes. Both kinds of baskets will prevent you from pushing your pole too deep into the mud or slush, providing extra support on these soft surfaces.
How to Adjust Your Snowshoe Pole Length for Hills
Snowshoe poles are extremely helpful for hikes with hills, by providing additional support and balance. They are also great for climbing or descending mountains, as they take a lot of pressure off your knees.
Adjustable poles work best for hilly terrain. You can vary the length of your pole to help you head uphill or downhill. With fixed-length poles, you’ll have to vary your grip position.
For downhill snowshoeing, you’ll want to lengthen the pole. For uphill snowshoeing, you should shorten your poles. Adjusting your poles will allow you to keep your elbow at a comfortable angle, and prevent you from leaning to accommodate the pole length.
Alternatively, if you don’t want to adjust your poles, you can adjust your hand position. This can be useful for rolling terrain, where you might have to switch pole lengths too often. If you’re heading uphill, you can slide your hand down to the lower extended grip. Or, if you’re going downhill, grab the top of the handle instead of lengthening the poles.
If you are walking across a slope, you’ll need to adjust your poles unevenly. Shorten the pole on the uphill side and lengthen the pole on the downhill side. This will accommodate the elevation difference, allowing you to support yourself without leaning in one direction.
Do I Need One or Two Snowshoe Trekking Poles?
Whether you use one or two trekking poles is up to you. Some people like having extra support on both sides of their body, while others only need the extra support on one side.
If you only use one pole, you lose some advantages to using the snowshoe poles. You won’t be able to put as much weight into the poles. Also, your walking will be asymmetrical. You’ll need to use good technique so you don’t put extra stress or weight on other parts of your body.
Only using one pole will save you some money, however. Some brands sell single hiking poles. Alternatively, if you have to buy the pair, you can keep the second as a backup or sell it.
If you only have to carry one pole, you will be saving a bit of weight that you have to carry. However, snowshoe trekking poles are lightweight. Also, they reduce the weight load on your lower body, so it might not feel significantly different leaving one pole at home.
Trekking Poles vs Ski Poles for Snowshoeing
If you are a skier, you might be wondering, “Can I use my ski poles instead of snowshoe poles for snowshoeing?”
Technically, the answer is yes. However, your ski poles won’t give you the same advantages that a snowshoe pole provides.
Snowshoe poles have an adjustable shaft, allowing you to quickly and easily change the length of the pole. This is a huge advantage when you’re snowshoeing in hilly terrain!
Often, the length of ski poles is not adjustable. Instead, you’ll have to shift your hand around on the pole, making you unable to use the wrist straps.
Also, snowshoe poles often have an extended foam grip below the handle. This extended grip will give you a firmer hold on the snowshoe pole (the pole’s body tends to be slippery to hold). Ski poles often don’t have this extended grip.
Lastly, ski poles are usually not collapsible, making them more difficult to pack away. Snowshoe poles can fold or telescope down so that they are shorter. This makes snowshoe poles easier to attach to your bag when you are not using them.
Snowshoe Poles vs Trekking Poles
You might be wondering what the difference is between snowshoe poles vs hiking poles. Well, there isn’t really a difference between snowshoe poles and trekking poles. Snowshoe poles are simply trekking poles with snow baskets attached to the end.
Some brands will market their poles separately as snowshoe poles. In this case, they usually sell the poles with snow baskets only, instead of mud baskets. You can buy baskets separately, but many trekking poles come with both snow and mud baskets.
If you already own a good set of hiking poles, you can usually convert them to snowshoe poles by adding snow baskets. If your poles did not come with snow baskets, you can purchase them separately.
Converting Trekking Poles for Snowshoeing
If you want to use trekking poles for snowshoeing, you will need to switch the mud basket to a snow basket. Many trekking poles will come with a small mud basket installed, but these baskets are not effective in soft snow.
Often, poles will be sold with snow baskets. If not, you can purchase snow baskets separately. Snow baskets aren’t always universal (interchangeable) between brands, so make sure you check whether the basket fits your poles before you buy it!
To remove the mud basket from your pole, you’ll need to turn the basket counter-clockwise (left) several times. Then, the basket should come right off.
To put the snow basket on your pole, put the tip of the pole through the middle of the snow basket. Then, rotate the basket clockwise (right) several times, until the basket is securely fastened to your pole.
Final Thoughts
Snowshoe poles will serve you well on your snowshoeing adventures. Give them a try and you’ll probably fall in love with using them. We definitely did!
If you’re looking for more articles about snowshoeing and other winter activities, check out these other articles:
Top Travel Tips & Resources
- Travel Insurance – If you’re travelling internationally, travel insurance is a must for any trip. Being covered by insurance is especially important when you’re going to an adventure-filled place like British Columbia. If you injure yourself while adventuring, you want to have insurance! We recommend using SafetyWing for international travel insurance. They are affordable and have great policies for travellers, digital nomads, and remote workers. Also, SafetyWing provides COVID-19 coverage, which many other insurance companies don’t cover.
- Car Rental – We find the best deal on vehicle rental prices using RentalCars.com. They compare the prices for different car rental companies so you can find the best deals out there!
- Accommodations – We prefer booking all of our hotels, hostels, and other accommodations through Booking.com because they have a flexible cancellation policy. Also, there are lots of different options on their platform, from hotels to vacation homes. Alternatively, Expedia and Hotels.com are good for booking accommodations. For vacation home rentals, VRBO is an excellent choice (they have lower fees than Airbnb, many of the same properties, and are more ethical).
- Flights – You’ll find many good flight deals on Skyscanner or Google Flights. You can book flights through these websites and they’ll help you find the best prices and flight times. If you fly at less popular times (e.g. mid-week or red-eye flights), you can also save some money.
- Tours – Get the most out of your vacation by taking a guided tour! This is a great way to see the city, adventure to exciting new locations, and learn about the local culture. Viator or GetYourGuide are great options for booking tours.

